

wardmundy
Nerd Uno
- Joined
- Oct 12, 2007
- Messages
- 20,437
- Reaction score
- 6,151
PIONEERS: I think we've got inbound faxing sorted out for Incredible PBX 2027 platforms.
If you want to take it for a spin, here's the drill. First, be sure you have a trunk/DID that supports faxing.
HINT: All VoIP.ms trunks work just fine.
1. Log into Linux CLI as root and issue these commands:
2. Set your email destination address for incoming faxes replacing [email protected] below:
3. In the FreePBX GUI, check to be sure you still have a Custom Destination called Fax (HylaFax). If not, create it:
4. Download and install the Fax module for FreePBX:
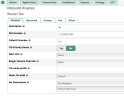
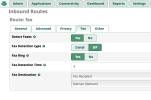
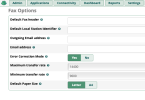
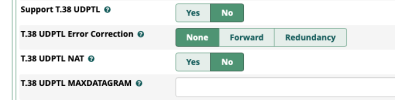
5. In the FreePBX GUI, modify each of your Inbound Routes to support incoming faxes from the DIDs you'll be using for inbound faxes. In the new Fax tab, edit the settings as shown below, save the settings, and reload your dialplan.
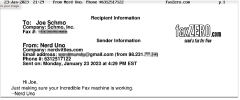
Send a test fax to your DID while watching the Linux CLI for issues: https://faxzero.com/
If you want to take it for a spin, here's the drill. First, be sure you have a trunk/DID that supports faxing.
HINT: All VoIP.ms trunks work just fine.
1. Log into Linux CLI as root and issue these commands:
Code:
apt install libtiff-tools -y
# For Rocky 8, yum install libtiff libtiff-tools -y
sed -i '/^\[custom-fax/,/^$/d' /etc/asterisk/extensions_custom.conf
echo '
[custom-fax-iaxmodem]
exten => s,1,Answer
exten => s,n,Wait(1)
exten => s,n,Verbose(3,Incoming Fax)
exten => s,n,Set(FAXEMAIL=)     ; fax email address of recipient
exten => s,n,Set(FAXDEST=/tmp)  ; folder where faxes will be stored
exten => s,n,Set(tempfax=${STRFTIME(,,%C%y%m%d%H%M)})
exten => s,n,ReceiveFax(${FAXDEST}/${tempfax}.tif)
exten => s,n,System(/usr/bin/tiff2pdf -o "${FAXDEST}/${tempfax}.pdf" "${FAXDEST}/${tempfax}.tif")
exten => s,n,System(/usr/bin/echo "Incoming fax is attached." | /usr/bin/mail -s "Incoming FAX Received" -A "${FAXDEST}/${tempfax}.pdf" "${FAXEMAIL}")
exten => s,n,Hangup

' >> /etc/asterisk/extensions_custom.conf
2. Set your email destination address for incoming faxes replacing [email protected] below:
Code:
sed -i 'FAXEMAIL=|[email protected]|' /etc/asterisk/extensions_custom.conf
fwconsole ma downloadinstall fax
rm /tmp/*
fwconsole reload
3. In the FreePBX GUI, check to be sure you still have a Custom Destination called Fax (HylaFax). If not, create it:
Code:
Target: custom-fax-iaxmodem,s,1
Description: Fax (HylaFax)
Return: No
4. Download and install the Fax module for FreePBX:
Code:
fwconsole ma downloadinstall fax
fwconsole reload
5. In the FreePBX GUI, modify each of your Inbound Routes to support incoming faxes from the DIDs you'll be using for inbound faxes. In the new Fax tab, edit the settings as shown below, save the settings, and reload your dialplan.
Code:
 Yes
 SIP
 No
 5
 Custom Destinations
  Fax (HylaFax)
Send a test fax to your DID while watching the Linux CLI for issues: https://faxzero.com/
Last edited:






 Phone System