

wardmundy
Nerd Uno
- Joined
- Oct 12, 2007
- Messages
- 20,410
- Reaction score
- 6,127
If you have a RasPi 4, 400, 5, or 500 with at least 4GB of RAM, today is your lucky day.
On your PC, Mac, or Linux Desktop
1. Download the latest Raspberry Pi Imager for your platform.
2. Insert a 32GB MicroSD card into one of these devices
3. Plug the device into your computer
4. Run the Imager app and follow these steps: choose your Pi 4/400 or 5/500 platform, and choose Raspberry Pi other image
5. Select Raspberry Pi OS Lite (64-bit) image for trixie.
6. Choose your SD card destination and Skip Customization, then Write and Finish by removing device.
On your Raspberry Pi
1. Insert the microSD card and boot the machine
2. Specify nerd as new user with password for the password
3. Login as nerd
4. Run: sudo passwd root
5. Logout and log back in as root
6. Run: userdel nerd
7. Run: raspi-config and configure WiFi in System Options and Expand Disk in Additional Options
8. Run: systemctl stop nftables
9. Run: systemctl disable nftables
10. Run: systemctl mask nftables
11. Run: nano -w /etc/ssh/sshd_config and Change then Save:
PermitRootLogin yes
PasswordAuthentication yes
KbdInteractiveAuthentication yes
12. Run: systemctl restart ssh
13. Run: reboot
14. Login via SSH as root and issue the following commands to install Incredible PBX 2026:
On your PC, Mac, or Linux Desktop
1. Download the latest Raspberry Pi Imager for your platform.
2. Insert a 32GB MicroSD card into one of these devices
3. Plug the device into your computer
4. Run the Imager app and follow these steps: choose your Pi 4/400 or 5/500 platform, and choose Raspberry Pi other image
5. Select Raspberry Pi OS Lite (64-bit) image for trixie.
6. Choose your SD card destination and Skip Customization, then Write and Finish by removing device.
On your Raspberry Pi
1. Insert the microSD card and boot the machine
2. Specify nerd as new user with password for the password
3. Login as nerd
4. Run: sudo passwd root
5. Logout and log back in as root
6. Run: userdel nerd
7. Run: raspi-config and configure WiFi in System Options and Expand Disk in Additional Options
8. Run: systemctl stop nftables
9. Run: systemctl disable nftables
10. Run: systemctl mask nftables
11. Run: nano -w /etc/ssh/sshd_config and Change then Save:
PermitRootLogin yes
PasswordAuthentication yes
KbdInteractiveAuthentication yes
12. Run: systemctl restart ssh
13. Run: reboot
14. Login via SSH as root and issue the following commands to install Incredible PBX 2026:
Code:
wget https://filedn.com/lBgbGypMOdDm8PWOoOiBR7j/IncrediblePBX2026/IncrediblePBX2026-raspi.sh
chmod +x IncrediblePBX2026-raspi.sh
./IncrediblePBX2026-raspi.sh
Last edited:

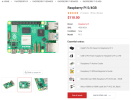
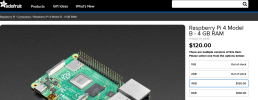
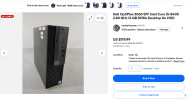
 . But there are many with old RasPi devices still lying around. Gotta say I still love their all-in-one keyboards, but they've gotten pricey, too. Almost $300...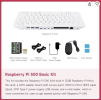





 Phone System